Tutorial (Second Stage, Steps 1 - 15) - Film Artwork Design
<<< Previous Steps (Stage A, Steps 1-10)
Second Stage - adding images to the filmstrip:
-
At the shapes properties toolbar (the upper toolbar, figure no.9) select the Rectangle Shape
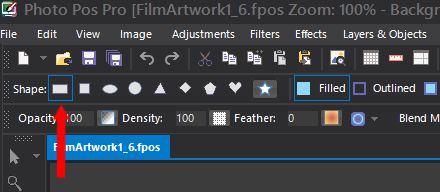
figure no.9
-
Set the Fore Color/Style to White (found on the upper right side)
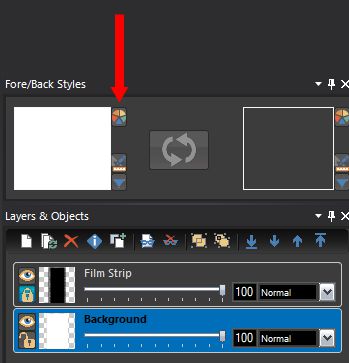
figure no.10
-
Use the mouse to draw a blank white rectangle that we later will fill with photo, move & resize the rectangle to the desired location (figure no.11)
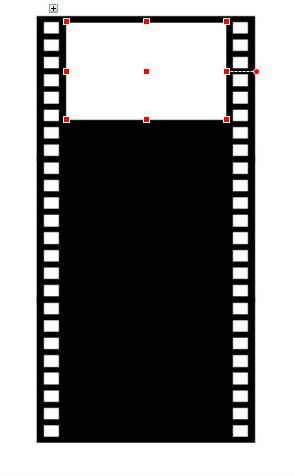
figure no.11
-
Click Ctrl + C (Or Edit -> Copy menu) to copy the blank rectangle
-
Click Ctrl + F (Or Edit -> Paste Into Current Image menu) to paste a copy of the blank rectangle and drag to the desired location
-
Repeat step 4 two more times to get a filmstrip with 4 blank rectangles on it (figure no.12)
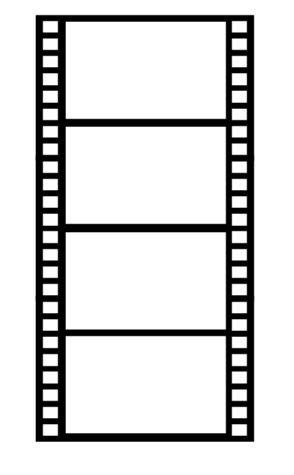
figure no.12
-
From the tools (the left) toolbar choose the Content Transform Tool (figure no.13).
Selecting this tool will allow us later to fit the images that we will put into the blank white rectangles
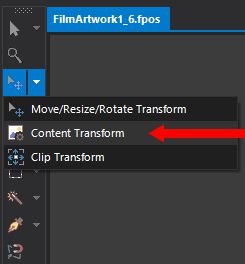
figure no.13
-
At the upper shortcuts toolbar click on the Dragging Files Options button and select "Set Dragged File(s) as Object Content" (or click File -> Dragging Files Options -> "Set Dragged File(s) as Object Content" menu).
Doing this will allow us to drag image files from windows files explorer to the blank white rectangles we created
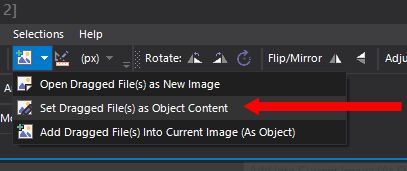
figure no.14
-
Open Windows files explorer, browse to the desired photos directory (the photos that you will use to fill the film strip), select a photo you like to put in the film strip and drag it into the upper blank white rectangle of the film strip (figure no.15)
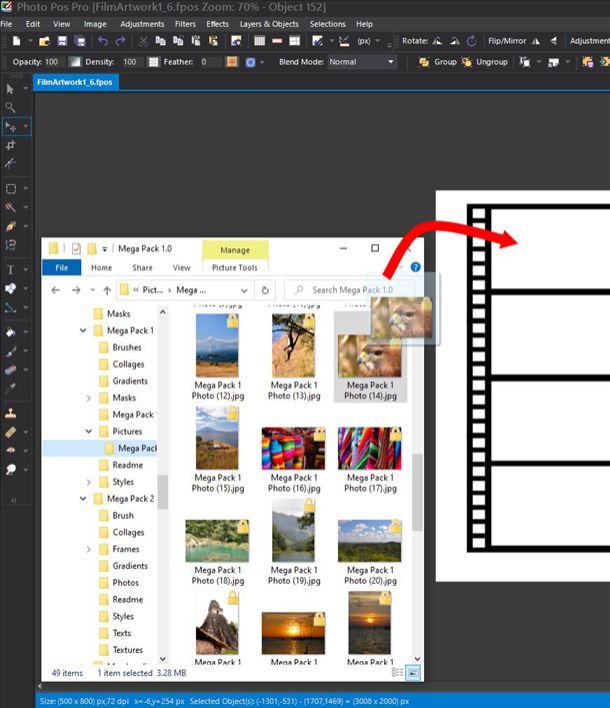
figure no.15
-
Optional: You can easily fit the image (as resize, rotate, move and etc.) to the rectangle by click on the rectangle and use the BLUE interface to control the rectangle content/style - In our case the content is the photo you dragged into it (figure no.16)
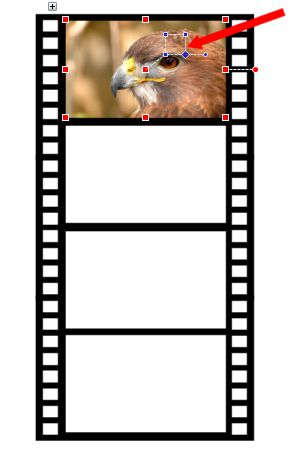
figure no.16
-
Repeat steps 9 & 10 for each blank rectangle until you'll get a film strip filled with your photos (figure no.17)
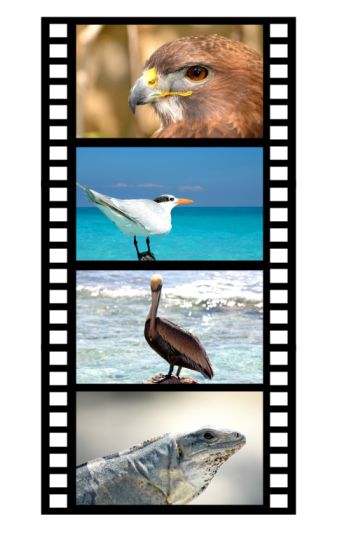
figure no.17
-
As previously said, by default, to allow maximum flexibility each shape you draw creates a new layer for the drawn shape. As you can see on the Layers Objects panel. If you followed the instructions by now you should have image with six layers - a background layer, a film strip layer and four addional layers - each for a photo rectangle
We will now merge the photo rectangles and the film strip into one big shape, to do that:
- On the layers panel select (click) the most upper layer (shape 4), next press and hold the ctrl key and select (click) shape 3, shape 2, shape 1 and also select the film strip in order to to select all layers except of the background layer (figure no.18-1)
- Click on the Merge/Flat Layers button to merge the five layers into one big layer (figure no. 18-2)
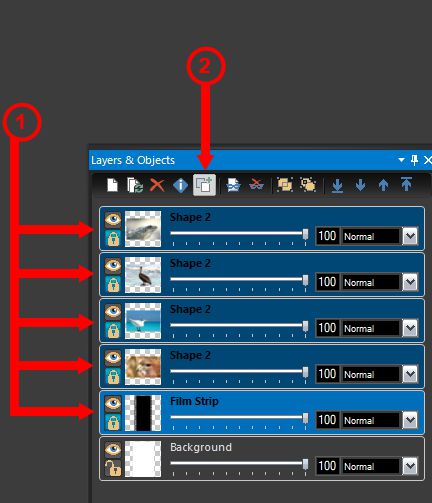
figure no.18
-
At this stage you should have image with two layers: a background layer and the film strip layer (the software probably named it as object xx). At the layers panel select (click on) the film strip layer (figure no.19-1). Next click on the item info button (figure no.19-2) and change the name of the layer to Film Strip
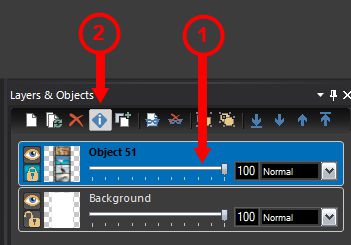
figure no.19
-
Make sure the Film Strip layer is selected on the layers panel, next click on Effects -> Deformations -> Flag menu and set the values as shown on figure no. 20
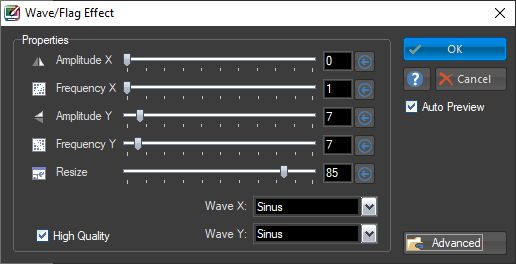
figure no.20
Continue Tutorial (Stage B, Steps 16-30) >>>
|