Chapter 1: Quick introduction to Photo Pos Pro
When you open Photo Pos Pro you'll be first asked to select the software interface. For this guide select the Pro interface (you can always change the interface later as shown here)
Next you'll be asked to select the software color scheme, for this guide we'll use the high contrast black scheme (you can always change the color scheme later as shown here)
If you wish do additional interface setups and customizations as setting bigger interface icons and texts please see here
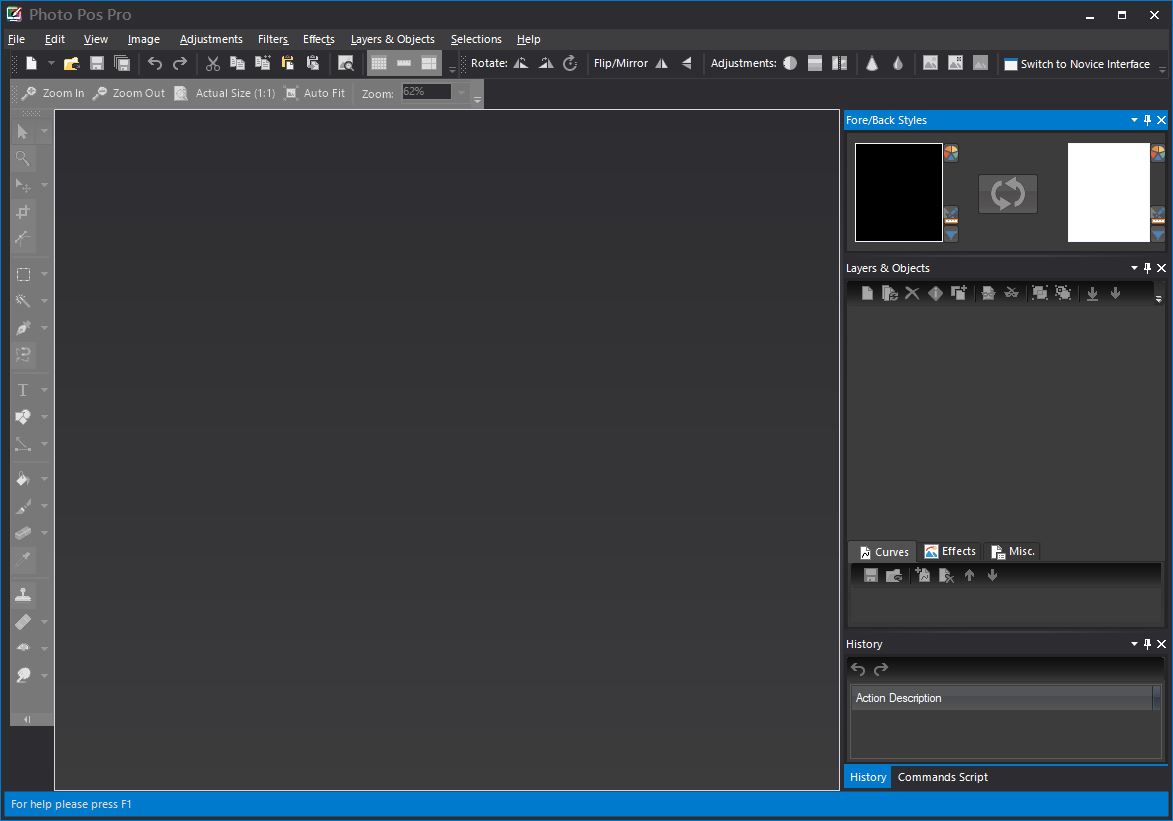
You'll notice when the software is loaded and there is no image file open inside it most of the menus and toolbars are disabled (figure no.1), but don't be worry they all will be enabled once you'll open an image file
|
|
|
figure no.1
|
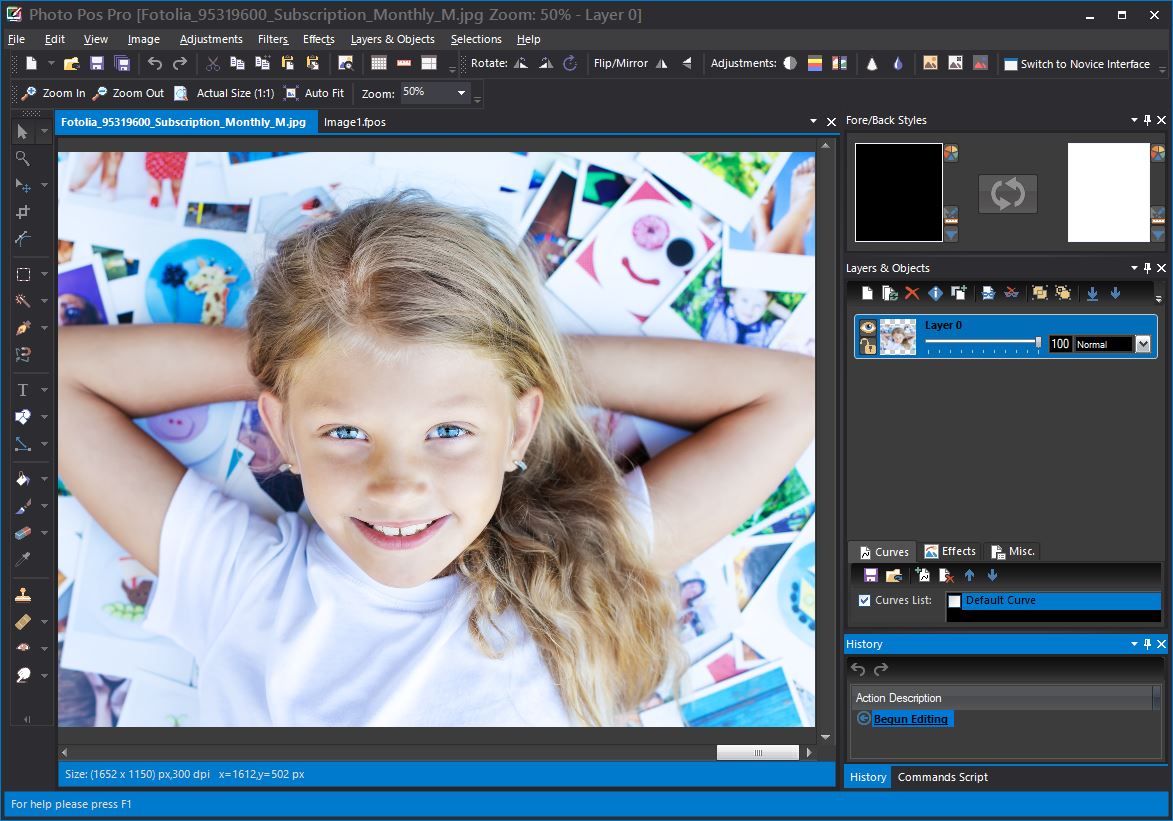
figure no.2
|
Once you'll open an image file to edit all the toolbars and the menus will be enabled, figure no.2 (In order to start working with the software you have to open the image file you wish to edit: click on the
File -> Open... menu, we will discuss this detailed later)
In order to continue with this guide please open some image file you wish to edit (click on the File -> Open... menu and select the desired image file)
Now that you have an image opened in the editor let's understand the editor interface parts:
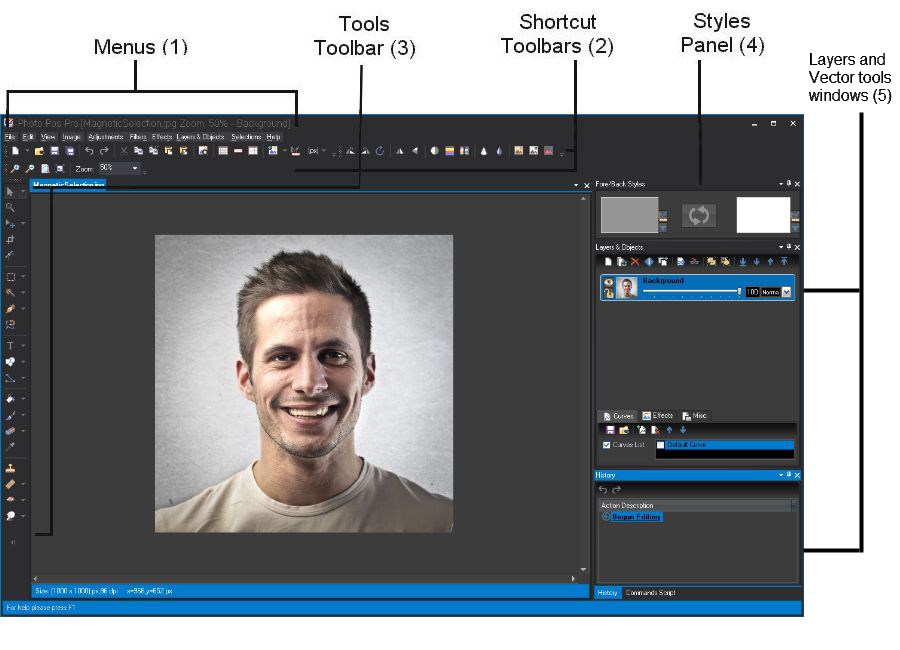
Here is a short detail of the program's interface:
- Menus - The menus contain most of the program's functions and are used to activate them.
- Shortcuts Toolbar - A toolbar containing shortcuts for the common operations from the menus.
- Tools Toolbar - A toolbar containing many editing and image editing tools which is also used to activate them.
- Styles Panel - The Styles Panel contains the following elements:
- Fore (Main) Style - One of two main styles used by many tools in the program. The fore style box can be found at the top of the styles panel on the left. To select a new fore style, click on the fore style box and choose a new style.
- Back Style - One of two main styles used by many tools in the program. The back style box can be found at the top of the styles panel on the right. To select a new back style, click on the back style box and choose a new style.
- Layers and Vector tools windows - The layers window and the layers menu contains functions related to layers such as creating a new layer, deleting a layer, renaming a layer, changing of a layer's location and more.
Working Procedure with the Program
The program contains dozens of photo editing functions, functions for repairing photod, effects, work tools, editing tools, selection tools and many more diverse possibilities. Even though there is much diversity, it is possible to separate most of the program's operations into a number of principal categories:
- Photo editing Functions (such as color and brightness changes, image repairs, filters, effects and many more) - These are the principal functions found under the menus and in the Shortcut Toolbar.
- Drawing and Editing Tools (such as paintbrushes, general drawing tools, text tools and more) - These tools are found under the Tools Toolbar.
- Selection Tools (such as the Standard Selection, Magic Wand and more) - These tools are also to be found under the Tools Toolbar.
- Layers and Masks Tools (such as creating and deleting layers and masks, changing and editing layers and masks and more) - These tools are generally to be found under the toolbars in the Layers window.
- Assorted/Other - All the rest of the tools and windows in the program such as the layers panel, tools properties ,script editor more.
Enlarge software interface icons & text size
If the software interface icons & texts are too small for you you can easily increase their size by clicking on the View -> Toolbar Icons & Texts Size menu and select the desired size
Next, Chapter 2: Understanding Photo Pos Pro editing principles Part A >>>