|
|
Previous Version (v1.90.6/7):
|
|
|
|
|
Photo Pos Pro v4 - Smart Area(s) Selecions
Smart/Auto Selection Tools
 The software's smart selection toolbox contains 3 main selection tools + 2 sub tools: Magic Wand & Super Wand, Selection Brush & Magic Selection Brush and the Magnetic Selection tool. With the smart selection tools it is possible to select super complex area(s) from complex scenes and to perform various operations
Smart Selection Tools tutorials (Take out/in someone from a photo (Or replacing an image background))
Magic Wand & Super Wand (Selection) Tools
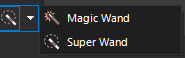
The Magic Wand & Super Wand tools enables the selection of areas in a picture which have similar levels of brightness/hue. (For example, when there is an image on a background with the same hue, it is possible to select the background easily with the Magic Wand. After selecting the background, it is possible to perform the invert operation on the selection and by doing so, in effect, selecting the image). In order to activate the tool, press the Magic Wand/Super Wand Tool menu button in the Tools Toolbar.
* The Super Wand is a new selection tool frst released in PPP 3, it is more powerful then the traditional magic wand and uses some AI algorithms to better select complex area(s)
The tool's properties toolbar(s) (found on the top of the screen below the shortcuts toolbar) contains a number of commands through which it is possible to control the tool's properties.
- Tolerance/Super Tolerance - With this regulator it is possible to decide the scope of the hues which will be selected (in relation to the original hue selected from the picture). The higher the value of the Tolerance is, the scope of the hues selected will be larger and so the area of selection will increase as a result. The lower the value is, the smaller the scope of the hues will be and the closer it will be to the original hue and so, the area which will be selected will be smaller.
- Match Mode (Magic Wand Only) - With this box it is possible to select the way in which the hues are matched, on which the selection operation is based.
- Source (Input) - Defines what the selection will be based on: the active layer or the picture as it appears on the screen (the combination of layers).
- Scan Mode (Magic Wand Only) - Defines the method of selection. Normal is the traditional selection of Magic Wand. In this method, the selection will be performed from the initial point outward. All Pixels - In this method, the entire picture/layer will be scanned (depending on the Select Area By value) and all the areas on the picture/layer with the same hue will be scanned as well. Super Scan is the traditional selection of Magic Wand + AI algorithm to improve results
- Contour Only - Checking this option will cause the tool to select according to the contour of the area
- Fill Holes - The fill holes factor will cause the tool to fill any hole in the selected area the is greater than fill hole factor value
- The tool's properties toolbar(s) (found on the top of the screen below the shortcuts toolbar) contains a number of commands through which it is possible to control the tool's properties.
- Smooth (Antialias) - Selection Antialias ON create a object/selection area with smooth edges (which will blend smoother with the surrounding background). The smoothing is created by adding semi-transparent pixels to the edge area of the image and in so creating a smoother transition and integration between the object/selected area and the background.
- Selection Mode dropdown:
- Replace/Keyboard - In case no key is pressed the new created selection will replace the current selection. In case Shift key pressed the new created selection will be added to the current one. In case Ctrl key pressed the new created selection will be subtract from the current one
- Add - The new created selection will be added to the current one.
- Subtract - The new created selection will be subtract from the current one
- Moving Dropdown: Using this dropdown you can select if moving/transform the selection area with the mouse will move/transform only the selection area only or move the selection area + the content with in it. When moving/tranforming the selection with the content a new layer will be created with the moved/transformed content (to merge the moved content with the source layer, in the layers window select both the moved and the source layers by ctrl + click on each on of them, next click on the flat/merge layers button on the layers toolbar)
- Select None: A command used to cancel an existing selection on the image, in case a selection was made. After you have finished working with the selection and you wish to go back and work on the entire image (return to the original state), you must activate the Select None function.
- Delete/Clear dropdown:
- Delete Selected Area: This command will delete the selected area content (on the active/selected layer) depend on the layer mask lock mode, same as clicking on the delete key
- Clear Selected Area (Fill With Fore Style): This command will clear the current selected area content (on the active/selected layer) and will fill it with the current software fore style
- Clear Selected Area (Fill With Back Style): This command will clear the current selected area content (on the active/selected layer) and will fill it with the current software back style
How to use the tool
In order to (actively) select an area on the picture, use the mouse to point on the spot where you wish the selection to begin. Click on it with the mouse's left button. While keeping the button pressed, drag the mouse until you reach the desired shape. To finish the operation, release the mouse's left button. The selection created will appear on the screen.
Selection & Magic Selection Brush
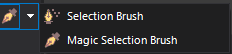
The Selection & Magic Selection Brush tools enables you to "paint" an area(s) that will be selected. Use the regular selection brush to freely select any area by "paint" it and use the magic selection brush to select complex area(s)/objects - simply "paint" over the complex area and the magic selection brush will use AI algorithm to smartly select the desired object . In order to activate the tool, press the Selection Brush/Magic Selection Brush Tool menu button in the Tools Toolbar.
* The Selection & Magic Selection Brush tools are new selection tools frst released in PPP 3
Magic Selection Brush Tutorial
- Selection Brush (shape) - With those toolbar buttons it is possible to select the geometric form of the selection brush.
- Size - With those toolbar controls it is possible to to set the selection brush size.
- Tolerance (Magic Selection Brush Only) - With this regulator it is possible to decide the scope of the hues which will be selected (in relation to the original hue selected from the picture). The higher the value of the Tolerance is, the scope of the hues selected will be larger and so the area of selection will increase as a result. The lower the value is, the smaller the scope of the hues will be and the closer it will be to the original hue and so, the area which will be selected will be smaller.
- (Magic Selection Brush Only) Fill Holes - The fill holes factor will cause the tool to fill any hole in the selected area the is greater than fill hole factor value
- Mode Dropdown (Magic Selection Brush Only) -
The Magic Selection Brush has four modes:
- Select Object From Inside: On this mode in order to select an object you have to continuously run (paint) on the object contour FROM THE INSIDE using the magic selection brush
- Select Object From Outside: On this mode in order to select an object you have to continuously run (paint) near the object contour FROM THE OUTSIDE using the magic selection brush
- Direct Area Select + Fill Holes (default mode): On this mode in order to select object/area you have to paint the entire area with the brush, the brush WILL automatically fill holes found inside the selected area
- Direct Area Select: On this mode in order to select object/area you have to paint the entire area with the brush, the brush WILL NOT fill holes found inside the selected area
- Feather - The Feather's value defines how the edges of the object/selected area will look. The lower the value of the Feather is, the sharper will the edges of the object/selected area be. The higher the value of the Feather is, the smoother and "soften" will the edges of the object/selected area be (will cause the edges to gradually integrate with the background).When the Feather's value is greater than 0 (i.e. when there is Feather), it is possible to select one of two types of Feather: Smooth feather or Sharp feathr. The selection of the Feather type is done with the Feather Type dropdown, located near the Feather Box.
- Smooth (Antialias) - Selection Antialias ON create a object/selection area with smooth edges (which will blend smoother with the surrounding background). The smoothing is created by adding semi-transparent pixels to the edge area of the image and in so creating a smoother transition and integration between the object/selected area and the background.
- Selection Mode dropdown:
- Replace/Keyboard - In case no key is pressed the new created selection will replace the current selection. In case Shift key pressed the new created selection will be added to the current one. In case Ctrl key pressed the new created selection will be subtract from the current one
- Add - The new created selection will be added to the current one.
- Subtract - The new created selection will be subtract from the current one
- Moving Dropdown: Using this dropdown you can select if moving/transform the selection area with the mouse will move/transform only the selection area only or move the selection area + the content with in it. When moving/tranforming the selection with the content a new layer will be created with the moved/transformed content (to merge the moved content with the source layer, in the layers window select both the moved and the source layers by ctrl + click on each on of them, next click on the flat/merge layers button on the layers toolbar)
- Select None: A command used to cancel an existing selection on the image, in case a selection was made. After you have finished working with the selection and you wish to go back and work on the entire image (return to the original state), you must activate the Select None function.
- Delete/Clear dropdown:
- Delete Selected Area: This command will delete the selected area content (on the active/selected layer) depend on the layer mask lock mode, same as clicking on the delete key
- Clear Selected Area (Fill With Fore Style): This command will clear the current selected area content (on the active/selected layer) and will fill it with the current software fore style
- Clear Selected Area (Fill With Back Style): This command will clear the current selected area content (on the active/selected layer) and will fill it with the current software back style
Magnetic Selection Tool
With this tool it is possible to select areas on the picture in any shape, the selection's lines will fix themselves automatically on the borderlines of the selected object (line edges - the borderlines/"edges" of the selected object - the areas in which there is a sharp transition of brightness). This tool is very useful when you want to mark/work with an object located on a complex background (when you want to perform an operation only on the object or when you want to separate the object from a complex background). With this tool it is possible to perform the task easily since the selection lines will know to automatically attach/adjust themselves to the outline of the object without troubling the user with precision or effort on his/her part. In order to activate the tool, press the Magnetic Selection menu button in the Tools Toolbar
* Photo Pos Pro v4 magnetic selection (previously known as "Magic Selection" in versions 1.xx) has been re-written from the scratch and have many vast improvements!
Magnetic Selection Tutorial
- Tolerance - With this regulator it is possible to decide the scope of the hues which will be selected (in relation to the original hue selected from the picture). The higher the value of the Tolerance is, the scope of the hues selected will be larger and so the area of selection will increase as a result. The lower the value is, the smaller the scope of the hues will be and the closer it will be to the original hue and so, the area which will be selected will be smaller.
- Tenstion - As higher the value the selected algorithm will use higher fractions to perform the calculations
- Sensitivity - As higher this value the magnetic selection algorithm will be more sensitive to hue changes on the selected object area edges
- Smooth - As higher the value the selected area will have smoother contour (the software uses this value when you end/close the selection session to perform a smoothing operation on the selected area contour to achieve fine selection contour)
- Feather - The Feather's value defines how the edges of the object/selected area will look. The lower the value of the Feather is, the sharper will the edges of the object/selected area be. The higher the value of the Feather is, the smoother and "soften" will the edges of the object/selected area be (will cause the edges to gradually integrate with the background).When the Feather's value is greater than 0 (i.e. when there is Feather), it is possible to select one of two types of Feather: Smooth feather or Sharp feathr. The selection of the Feather type is done with the Feather Type dropdown, located near the Feather Box.
- Smooth (Antialias) - Selection Antialias ON create a object/selection area with smooth edges (which will blend smoother with the surrounding background). The smoothing is created by adding semi-transparent pixels to the edge area of the image and in so creating a smoother transition and integration between the object/selected area and the background.
- Selection Mode dropdown:
- Replace/Keyboard - In case no key is pressed the new created selection will replace the current selection. In case Shift key pressed the new created selection will be added to the current one. In case Ctrl key pressed the new created selection will be subtract from the current one
- Add - The new created selection will be added to the current one.
- Subtract - The new created selection will be subtract from the current one
- Moving Dropdown: Using this dropdown you can select if moving/transform the selection area with the mouse will move/transform only the selection area only or move the selection area + the content with in it. When moving/tranforming the selection with the content a new layer will be created with the moved/transformed content (to merge the moved content with the source layer, in the layers window select both the moved and the source layers by ctrl + click on each on of them, next click on the flat/merge layers button on the layers toolbar)
- Select None: A command used to cancel an existing selection on the image, in case a selection was made. After you have finished working with the selection and you wish to go back and work on the entire image (return to the original state), you must activate the Select None function.
- Delete/Clear dropdown:
- Delete Selected Area: This command will delete the selected area content (on the active/selected layer) depend on the layer mask lock mode, same as clicking on the delete key
- Clear Selected Area (Fill With Fore Style): This command will clear the current selected area content (on the active/selected layer) and will fill it with the current software fore style
- Clear Selected Area (Fill With Back Style): This command will clear the current selected area content (on the active/selected layer) and will fill it with the current software back style
|
|

Help us keep Photo Pos Pro froever Free!
Even $1 donation can greatly help!
|
|