Chapter 2: Understanding Photo Pos Pro editing principles part A
In this chapter and the next ones we will learn to understand the principles of editing photo with Photo Pos Pro. Once you'll understand the principles you'll be able to control any editing task easily.
In order to follow this chapter please click on the above sample photo in order to download it:

The first step in editing a photo is load it to editor,
to load/open the sample photo you just downloded please click on the File -> Open... menu and select the photo "ch2a_SamplePhoto1.jpg" from your downloads folder. As discussed in chapter 1, once you loading a photo to the editor all the menus and tools will become enabled.
By default the photo will be loaded into a new tab and will be best fitted to the view size and the pointer tool will be selected.
In order to zoom in/out the image you can use the mouse wheel or the zoom commands on the upper toolbar (found and also under the view menu).
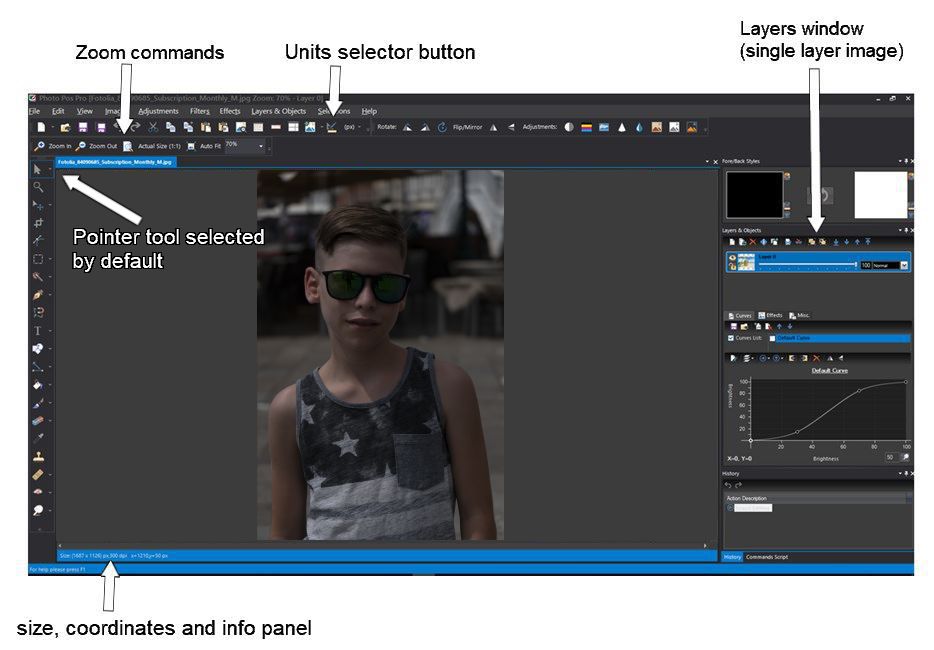
figure no.1
On the left bottom side found the size, coordinates & info panel (figure no.1). The information on the panel includes the image size (width x height), the mouse coordinates over the image and additional information that is relevant for the current active tool. For examle when the active tool is a selection tool the info will also include the size and the location of the selecion
By default the units on the info panel (and on the entire software) are in pixels units. You can easily change the units of the info panel and of the entire software into Inches or Centemeters via the Units selector button (founds on the middle of the most upper toolbar, figure no.1)
On the right side you can see the Layers Window. We will discuss layers in detail later,
what you need to know at this stage that an image is assembled of one layer or more (any image must have at least one layer). Usually photos taken by camera are single layered photos so if you opened a photo taken by your camera you'll see a single layer on the layers window.
Photo Pos Pro has two main type of editing options - function (commands) and tools:
Commands and Tools:
- Commands are editing functions that works automatically, most of them have custom parameters you can set, for example the brightness/contrast command has brightness level and contrast level parameters you can set to get the desired results.
Most commands can be run via the software menus and via the upper shortcuts toolbar (by default the top most upper toolbar)
Tools on the other hand are a set of editing functions that needs the user in order to work. For example the Paint Brush tool needs that the user will use the mouse to paint the desired area. Tools also have parameters you can set (usually tools have much more parameters than commands) for example on the Paint Brush tool you can set the desire paint brush size and shape, you can also set the opacity and the color of the brush and many other more parameters
Tools can be selected via the tools toolbar (by default the left toolbar). Once a tool is selected, the tool's parameters will be shown on a second toolbar (and for some tools as the text tool also on a third toolbar) below the shortcuts toolbar. Using those parameters toolbar you can set the tool properties.
Now that we understands that, let's go to the fun practical stuff :)
If you haven't done it by now, please open a photo that you with to edit
Next click on the Adjustments -> Brightness Contrast.. menu (or on the top right upper shortcuts toolbar  icon), (figure no. 2)
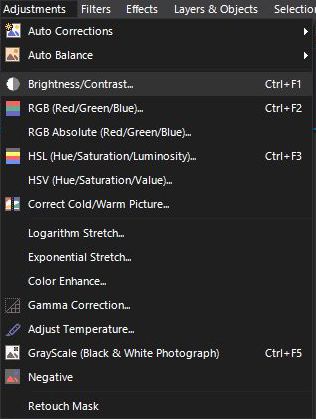
figure no.2
Once clicking the Adjustments -> Brightness Contrast, the Brightness Contrast dialog will be open (figure no. 3)
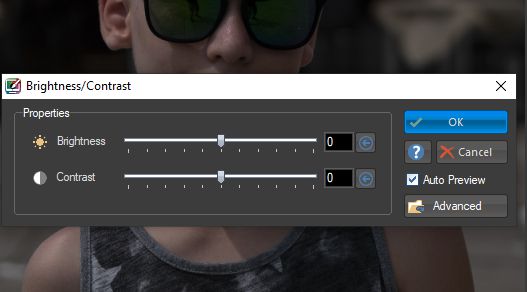
figure no.3
As previously mentioned, you can see that the brightness/contrast function have two main parameters you can set- brightness level and contrast level (at same manner each of the software functions has it's own specific parametes you can set). In addition to the specifc function parameters the functions screen has also some common parameters for all the functions. Those common parameters can be found under the Advanced secion (clicking the Advanced button we open up the advanced parametes section)
In addition the functions screen also has the "Auto Preview" option (checked by default), when this option is checked you'll be able to preview the function effect before clicking OK
Now let's try it out, play a little with the brightness and the contrast levels and watch the effect on the screen. As you can see the function runs automatically on the entire image. Now, please set brightness level to 70, the contrast level to 50 and click OK (figures no. 4)
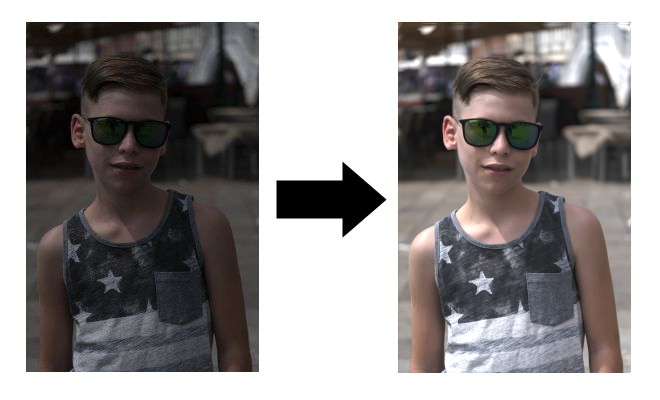
figure no.4
As you can see, once clicking OK the brightness/contrast function will take effect on the ENTIRE image. This is default behavior (because we have single image layer without any selected area).
We will discuss area selections and multi layer images in detail later. What you need to know at this stage is that any editing function/tool will run on the entire image by default. If there is an area(s) selected and/or layer(s) selected the function/tool will run on the selected area(s) and on the selected layer(s) only and not on the entire image.
* Area selection = when you wish to edit only specific area on the image and not the entire image. For example if you have an image of a flower on a background and you wish to apply some nice effect only to the flower and leave the background untouched. You can select single or mutiple area(s) on image
Undo/Redo action(s)
Using the Undo and Redo commands you can easily cancel or restore any actions you previously performed on the image. The Undo/Redo commands can be found under the Edit menu and also can be found on the top left upper shortcuts toolbar under the icons: Undo -  Redo -
If you wish to cancel the brightness/contrast action you can click on the Edit -> Undo menu (or on the undo icon on the upper left toolbar), if you wish to apply it again you can click on the Edit -> Redo menu (or on the redo icon on the upper left toolbar)
Next, Chapter 3: Understanding Photo Pos Pro editing principles Part B >>>