Tutorial - Gel Text Effect
Issue: Create realistic gel text effect (figure no.1)

figure no.1
To create Gel Text Effect simply follow these steps:
-
Create 800 x 250 new blank empty image (Click on File -> New -> Blank Image menu).
-
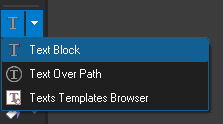
Choose the Text Block Tool:
In order to draw a text, point the mouse on the starting point of the text, press and hold down the left mouse's button . Next, drag the mouse's pointer to the spot where you wish the text to end and release the button.
-
After selecting the desires location, type in the desired text. To get a good effect choose big font size (100 or higher, we used "Comic Sans MS" size 120 font).
-
Set the text color to turquoise by selecting a turquoise fore color (R=72, G=196, B=221, figure no.2):

figure no.2
-
At this stage you you should have 2 layers image (a white background layer and a turquoise text layer),
Make sure the text layer is selected. Next click on Effects -> Light -> Shadow menu, on the Shadow dialog box set up the values as shown (figure no.3)
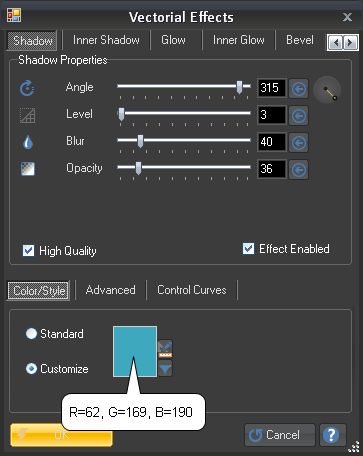
figure no.3
-
Next click on the Inner Shadow card index, on the Inner Shadow dialog box set up the values as shown (figure no.4)
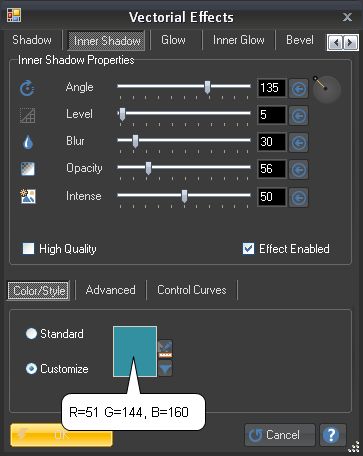
figure no.4
-
At this stage your text should look like this (figure no.5):

figure no.5
-
Next click on the Inner Glow card index, on the Inner Glow dialog box set up the values as shown (figure no.6 & 7)
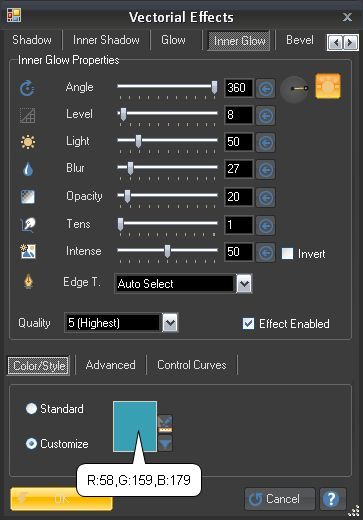
figure no.6 | | 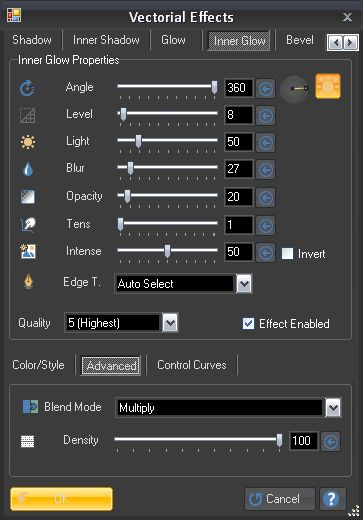
figure no.7 |
-
Next click on the Emboss card index, on the Emboss dialog box set up the values as shown (figure no.8, 9 & 10)
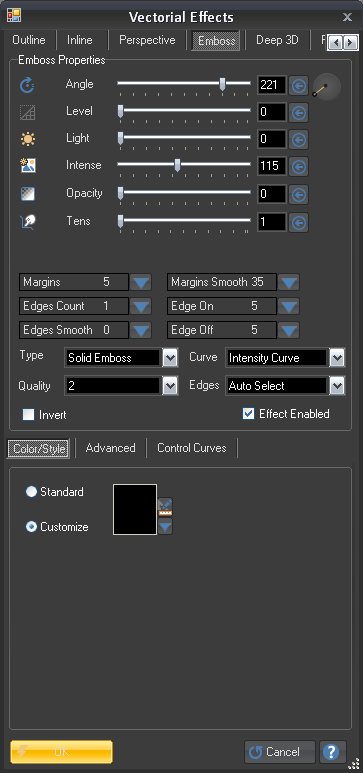
figure no.8 | | 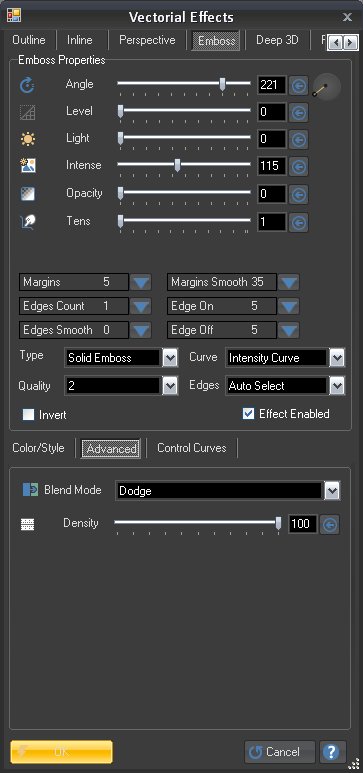
figure no.9 | | 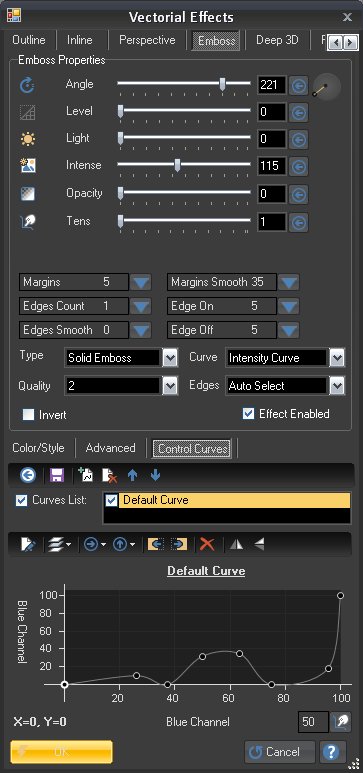
figure no.10 |
-
Finally you should get this realistic gel text effect (figure no.11)
figure no.11
-
Editing the Text:
Texts are vectorial layers/objects and therefore can be easily edited at any time
- Select the Text tool
- Select the desired Text Layer
- In order to add text: Click with the mouse on a desired text char to position the caret where you wish to add text and type in the additional text
- In order to delete text: Click with the mouse on a desired text char to position the caret where you wish to delete text and use the "<- Backspace" key to delete
- In order to change text size, font an etc.: Click with the mouse on a desired text char to position the caret, use the shift key + left/right arrow key to select the text you wish to edit (same as in word processor), next changed the desired text property on the text toolbar (the upper toolbar)
-
Note: Photo Pos Pro comes with many pre-made texts effects including the one shown on this tutorial. if you want to see the final result and more text effects examples select the Texts Templates browser tool and browse for the desire text effect
|