Chapter 6: The power of selections Part B
On this chapter we will continue to discuss the power of selections we started on the previous chapter where we discussed the basics.
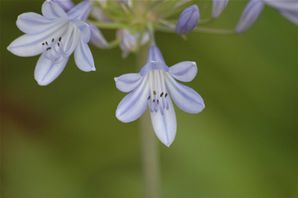
In order to follow this chapter please click on the above sample photo in order to download it:
In many cases we need to select more than one area on the image or select area combined of the join of two or more selected areas. Photo Pos Pro allows multi select, join (add) and subtraction of selected areas in order to be able to select complex areas/scence. This can be done by any of the selection tools.
In order to select complex areas on a picture:
- When there is a selection on the picture and you wish to add to the selection (i.e. select other areas on the picture and/or increase the selection), press the Shift key and perform the selection you wish to add or click on the "Selection Mode -> Add" button on the selection properties toolbar (the upper toolbar, using any one of the selection tools).
- In order to subtract (leave out) from a selection, press the Ctrl key and perform the selection you wish to subtract (leave out) or click on the "Selection Mode -> Subtract" button on the selection properties toolbar (the upper toolbar, using one of the selection tools).
Example: to select a donut/ring shaped area you must first select the circumference of the exterior ring (circle selection) and afterwards subtract from it (leave out) the inner circumference (selecting an inner circle which is smaller while pressing the Ctrl key).
Next we will use the sample photo to see a real case,
In order to load/open the sample photo you just downloded please click on the
File -> Open... menu and select the photo "ch6_SamplePhoto1.jpg" from your downloads folder.
In this case we want to select the two big flowers, in order to do that we will use a tool called Magic Selection Brush to select the first flower, next we will use the tool again with the "Selection Mode -> Add" option to select and add the second flower
-
From the Tools toolbar select the Magic Selection Brush (figure no.1)
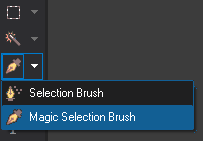
figure no.1
-
The Magic Selection Brush has four modes you can select from the Magic Selection properties (the upper) toolbar (figure no.2):
- Select Object From Inside: On this mode in order to select an object you have to continuously run (paint) on the object contour FROM THE INSIDE using the magic selection brush
- Select Object From Outside: On this mode in order to select an object you have to continuously run (paint) near the object contour FROM THE OUTSIDE using the magic selection brush
- Direct Area Select + Fill Holes (default mode): On this mode in order to select object/area you have to paint the entire area with the brush, the brush WILL automatically fill holes found inside the selected area
- Direct Area Select: On this mode in order to select object/area you have to paint the entire area with the brush, the brush WILL NOT fill holes found inside the selected area
For this example we will use the default mode (Direct Area Select + Fill Holes, figure no.2)
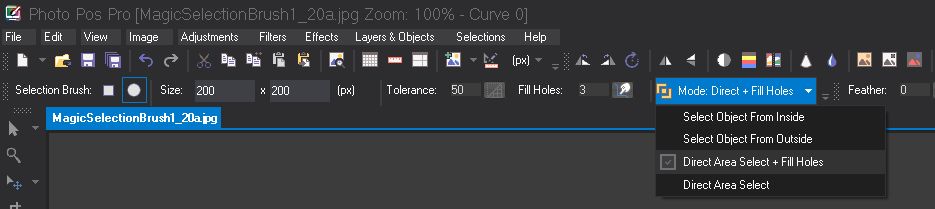
figure no.2
-
Next, since we wish to select more then one area, on the selections common properties (the right upper) toolbar we will set the selection mode to Add (figure no.3)
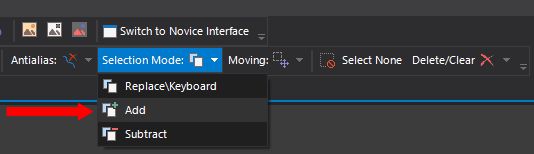
figure no.3
* Reminder: We can also press the Shift key during the selection action in order to Add it to the previous selection(s) or press the Ctrl key during the selection action in order to subtract from the previous selection(s)
-
In order to (actively) select the object simply start "paint it" with the brush. To entirely select the object make sure to completely "paint" it (figure no.4-1, 4-2)
- You can select ("paint") the object in multiple steps, simply "paint" each area on the object at a time (figure no.4-1, 4-2)
- Fixing wrong selected areas: If you accidently selected a wrong area to fix it simply repaint it while click and hold the Ctrl key (this will substruct the painted area from the over all selection. Tip - this substruction technique works for all of the selection tools)
- Finally you should get both flowers fully selected (figure no.4-3)
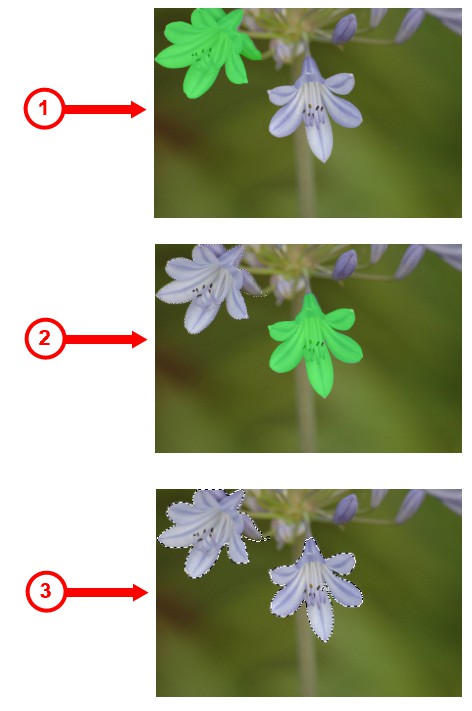
figure no.4
-
Next we will use the "macro" enhance function to make small items/close ups more sharp and clear. Click on the Filters -> Sharpen -> Macro Enhance... to open the Macro Enhance dialog (figure no.5)

figure no.5
-
On the Macro Enhance dialog fill in the values shown in figure no.6 and click OK to apply
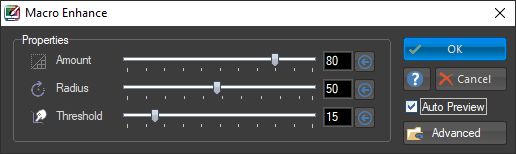
figure no.6
The Macro Enhance is very useful to enhance close up photos, the function has three parameters:
- Amount: Controls the amount of sharpness applied to the objects in the photo
- Radius: Control the size of the filter, actully this parameter controls the rougthness of the function effect, as higher the value as higher the rougthness
- Threshold: Controls the areas on the photo that will be affected by the function
-
Next we will do some manipulation on the background, to do that:
-
Click on the Selection -> Feather menu, on the Feather dialog set the Level to 6 and click OK (figure no.7)
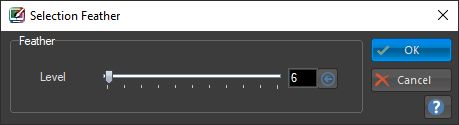
figure no.7
- Click on the Selection -> Invert menu (or Ctrl + i) in order to select the background and deselect the flowers
-
Click on Effects -> Colors -> Sepia... menu, on the Sepia dialog fill in the values shown on figure no.8
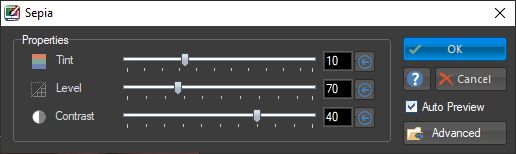
figure no.8
-
Click on the Selection -> Select None menu (or on the Esc key or Enter key) to clear the selection and get the final result (figure no.9)
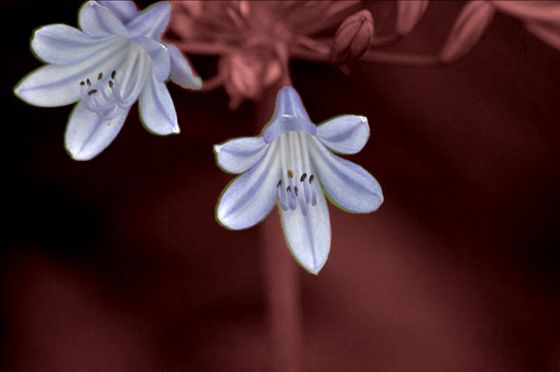
figure no.9